Welcome to our comprehensive guide on how to connect your Raspberry Pi to a laptop using USB. Whether you’re a tech enthusiast, a DIY hobbyist, or a beginner in the world of Raspberry Pi, this step-by-step tutorial will help you harness the power of your Raspberry Pi without the need for a separate monitor or Ethernet connection.
In this blog post, we will cover everything you need to know about connecting your Raspberry Pi to your laptop using a USB cable. You’ll learn how to set up your Raspberry Pi’s WiFi without a screen, enable LAN connectivity, find the IP address of your Raspberry Pi, and much more. So grab your Raspberry Pi and let’s get started on this exciting journey of discovery!
So, let’s dive in and explore the various methods and techniques you can use to connect your Raspberry Pi to your laptop without the hassle of additional hardware. Get ready to unleash the full potential of your Raspberry Pi in 2023!
How to Connect Raspberry Pi to Your Laptop Using USB
The Perfect Match: Raspberry Pi and Laptop
Ah, Raspberry Pi, the tiny yet powerful computer that has captured the hearts of tech enthusiasts worldwide. But what if you want to connect your Raspberry Pi to your laptop using a USB connection? Fear not, my fellow tech aficionados! I’m here to guide you through this magical connection process with some easy-to-follow steps.
Step 1: Gather Your Tools
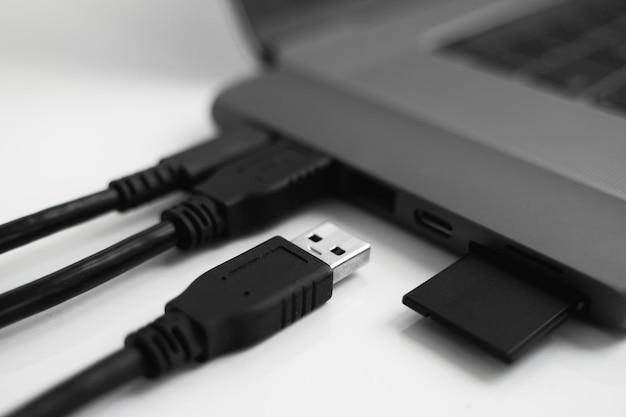
Before we delve into the exciting world of USB connections, let’s make sure we have all the essential tools. You’ll need your trusty Raspberry Pi, a USB cable (preferably a USB-A to USB-A cable), and of course, your reliable laptop. Remember, it’s always a good idea to double-check that everything is in working order before you proceed. We don’t want any surprises along the way!
Step 2: Power Up That Raspberry Pi
Now that we’ve got our tools ready, let’s give some power to our beloved Raspberry Pi. Connect one end of the USB cable to your laptop’s USB port and the other end to the micro USB port of your Raspberry Pi. Voila! This USB connection not only powers up your Raspberry Pi, but it also establishes a data connection between the two devices. It’s like a power couple, literally!
Step 3: Open the Doors of Connection
With the power flowing through our USB connection, let’s open the doors of connection on our laptop. Depending on your operating system, you might need to do a teensy bit of tweaking. Fear not, my dear Windows users. Simply open Device Manager, find the “Raspberry Pi USB Ethernet/RNDIS Gadget” entry, and enable it. For you devoted macOS lovers, open Network Preferences and manually add a new network interface for your Raspberry Pi. Linux users, you already know the drill. Open up a terminal and type in a few commands to enable the connection. Easy peasy!
Step 4: Close the Connection Loop
You’re almost there, my curious companion! It’s time to close the connection loop. On your Raspberry Pi, open up a terminal and type in ifconfig. Look for the “usb0” entry, which represents our USB connection. Take note of the IP address associated with it, as this will be your gateway to the Raspberry Pi wonderland.
Step 5: Embrace the Raspberry Pi World
Now that everything is set up, take a deep breath and let the excitement sink in. Open up your favorite SSH client on your laptop (PuTTY, anyone?) and connect to the IP address you obtained in the previous step. Once you’re in, it’s like stepping into another universe. You have complete control over your Raspberry Pi, just like a puppet master! Update your software, explore new projects, or simply bask in the glory of this USB connection achievement. The possibilities are endless.
Congratulations, my tech-savvy friend! You’ve successfully connected your Raspberry Pi to your laptop using a USB connection. Now you can dive into the boundless world of Raspberry Pi while enjoying the convenience of your laptop. So go forth, experiment, and let your creative ideas flourish with this newfound connection. Happy tinkering in 2023!
FAQ: How To Connect Raspberry Pi To Laptop Using USB
Introduction:
In this FAQ-style guide, we’ll cover everything you need to know about connecting a Raspberry Pi to your laptop using a USB connection. Whether you want to use your laptop as a monitor, connect to Wi-Fi without a screen, or find your Raspberry Pi’s IP address on your laptop, we’ve got you covered. So let’s dive right in!
How can I use my laptop as a monitor
If you’re looking to use your laptop as a monitor for your Raspberry Pi, unfortunately, this method isn’t directly supported. Although it would be quite handy, your laptop’s HDMI port is generally an output port, meaning it sends signals to external displays. So, connecting your Raspberry Pi to your laptop via HDMI won’t work for display purposes. But don’t worry, there are alternative ways to achieve what you’re aiming for!
How do I connect my Raspberry Pi to Wi-Fi without the screen
So, you want your Raspberry Pi to connect to Wi-Fi, but you don’t have a screen to configure it? No problem! Here’s a nifty way to get it done:
-
Insert the SD card with the Raspberry Pi OS into your computer.
-
Open the SD card, look for the
bootdirectory, and create an empty file namedssh(without any file extensions). -
Next, create another file called
wpa_supplicant.confand open it with a text editor. Add the following lines:
country=US
ctrl_interface=DIR=/var/run/wpa_supplicant GROUP=netdev
update_config=1
network={
ssid=”Your_Network_Name”
psk=”Your_PSK_Passphrase”
key_mgmt=WPA-PSK
}
-
Replace
"Your_Network_Name"with the name of your Wi-Fi network and"Your_PSK_Passphrase"with the password. -
Save the file and eject the SD card from your computer.
-
Insert the SD card into your Raspberry Pi and power it up.
Now, your Raspberry Pi should automatically connect to the Wi-Fi without a screen!
How do I enable LAN on Raspberry Pi
If you want to enable Local Area Network (LAN) on your Raspberry Pi, follow these simple steps:
-
Connect your Raspberry Pi to your laptop using a USB cable.
-
On your laptop, open Device Manager (Windows) or System Information (macOS).
-
Look for the “RNDIS/Ethernet Gadget” device in the list.
-
Right-click (Windows) or Control-click (macOS) on the device and select Enable.
And voila! LAN has been enabled, and now you can connect to your Raspberry Pi via LAN (ethernet) without any hassle.
How do I find the IP address of my Raspberry Pi on my laptop
To find the IP address of your Raspberry Pi on your laptop, you can try the following methods:
-
Ping Sweep Method:
-
Open the terminal or command prompt on your laptop.
-
Execute the following command:
ping -c 255 192.168.1.0/24 -
Replace
192.168.1.0with the beginning of your IP range, if it’s different. -
Wait for the command to finish, and it will display the IP addresses of the devices connected to your network.
-
Look for the IP address associated with “Raspberry Pi Foundation” or similar.
-
Router Configuration Method:
-
Access your router’s configuration page by entering its IP address in your web browser.
-
Look for the “Connected Devices” or “DHCP Client List” section.
-
Find the entry with “Raspberry Pi Foundation” or similar, and note down the associated IP address.
With these methods, you should be able to discover the IP address of your Raspberry Pi on your laptop.
Does Raspberry Pi Zero have USB
Yes, the Raspberry Pi Zero indeed has a USB port. However, it’s a USB On-The-Go (OTG) port, which means it can function as both a USB device and a USB host. So, you can connect peripherals like a USB keyboard, mouse, or even use it as a USB gadget.
What is USB gadget mode
USB gadget mode is a nifty feature on the Raspberry Pi that allows it to act as various USB devices. By enabling gadget mode, your Pi can simulate being a USB keyboard, mouse, Ethernet adapter, or even a storage device. It’s a fantastic tool for experimenting and creating unique projects.
How do I connect a USB to my Raspberry Pi
Connecting a USB device to your Raspberry Pi is a breeze! Simply follow these steps:
-
Locate the available USB ports on your Raspberry Pi board.
-
Plug in the USB device into any of the USB ports.
-
Wait for your Raspberry Pi to recognize the device (it may take a few seconds).
That’s it! Your USB device should now be connected and ready to use with your Raspberry Pi.
Can you connect a Raspberry Pi to a PC with USB
Absolutely! You can connect your Raspberry Pi to a PC using a USB cable and make use of the USB gadget mode. This will allow your Raspberry Pi to simulate being a USB device, such as a keyboard, mouse, or Ethernet adapter. It’s a handy way to establish a connection between your Pi and your PC without the need for additional peripherals.
How do I connect my Raspberry Pi to my laptop without a monitor
If you don’t have a spare monitor and still want to connect your Raspberry Pi to your laptop, don’t worry, it’s possible! You can use the following steps:
-
Connect your Raspberry Pi to your laptop using a USB cable.
-
Enable LAN on your Raspberry Pi by following the steps mentioned earlier.
-
Find the IP address of your Raspberry Pi using the methods described earlier.
-
Open a terminal or command prompt on your laptop.
-
Use SSH (Secure Shell) to connect to your Raspberry Pi using its IP address.
With these steps, you can access and control your Raspberry Pi on your laptop without the need for a physical monitor.
How do I connect my Raspberry Pi to my laptop Windows 10
To connect your Raspberry Pi to your laptop running Windows 10, follow these steps:
-
Connect your Raspberry Pi to your laptop using a USB cable.
-
Enable LAN on your Raspberry Pi by following the steps mentioned earlier.
-
Find the IP address of your Raspberry Pi using the methods described earlier.
-
Download and install an SSH client on your laptop, such as PuTTY.
-
Open PuTTY and enter the IP address of your Raspberry Pi.
-
Click “Open” to establish an SSH connection.
And there you have it! You can now control your Raspberry Pi from your Windows 10 laptop using SSH.
That concludes our FAQ-style guide on connecting a Raspberry Pi to a laptop using USB. We hope you found it informative and entertaining. Now you can explore the possibilities of your Raspberry Pi without the hassle of extra equipment. Happy tinkering!