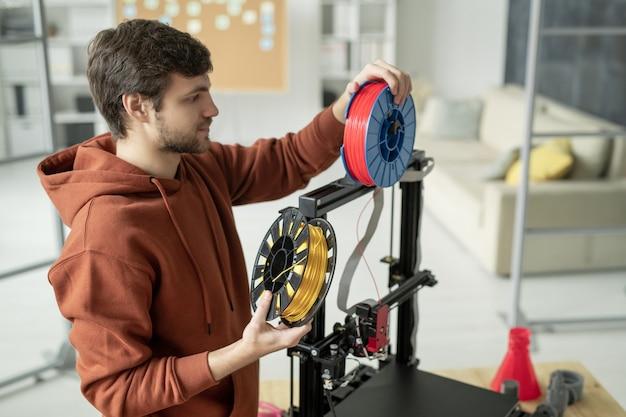
Have you been struggling with changing the filament on your Ender 5 3D printer? Don’t worry, you’re not alone! Many users face difficulties when it comes to replacing or swapping out filaments. Whether you’re a beginner or a seasoned 3D printing enthusiast, knowing how to change filament is a crucial skill to have. In this blog post, we will walk you through the process of changing filament on an Ender 5, step by step.
But before we jump into the nitty-gritty of filament changing, let’s address some common questions and issues that arise during this process. Why does filament keep getting stuck? What temperature should PLA be printed at? Can you use a 3D printer with a phone? How do you connect your computer to a 3D printer? These are just a few of the questions we’ll be exploring in this tutorial. So, grab your Ender 5, let’s dive in, and make filament changing a breeze!
How to Change Filament on Ender 5: A Fun and Easy Guide
Changing filament on your Ender 5 doesn’t have to be a hair-pulling, teeth-gritting experience. In fact, it can be quite the opposite – a breezy task that leaves you feeling like a 3D printing superstar. So, put on your superhero cape (or at least your trusty apron) as we dive into the epic adventure of changing filament on your Ender 5. We’ll walk you through each step with a sprinkle of humor and a dash of American flair. Let’s get started!
Gather Your Tools and Summon Your Inner Handyman
Unleash the Filament Hound (Or a Pair of Scissors)
To begin our filament-changing escapade, you’ll need a trusty tool to cut your old filament loose. Enter the Filament Hound—a fancy name we’ve given to a pair of scissors. This heroic creature will make quick work of the filament, setting you up for the grand replacement that lies ahead.
Plastic Bag Hero to the Rescue!
Oh, the tangled mess of a disentangled filament! Fear not, dear Ender 5 owner, for our next champion has arrived. The Plastic Bag Hero—yes, any old plastic bag will do—will save the day by keeping your old filament neatly contained, ready for disposal or repurposing.
Embark on the Great Unloading Adventure
Heat Bed: Turn Off and Let It Cool
Before we can embark on our journey to swap filaments, we need to ensure the heat bed is nice and chill. Just like a spa day for your Ender 5, we’re giving it a well-deserved break. So, turn off the heat bed and let it cool down as you prepare for your filament-changing conquest.
Filament Extrusion: Retraction Settings Engaged!
Next, we shall face the mighty beast known as the filament extrusion. But fret not! We have the wisdom to tame this creature. In your Ender 5’s settings, navigate to the retraction settings and unleash them to retract the filament smoothly. This will make the unloading process a breeze, allowing you to gracefully bid farewell to the old filament.
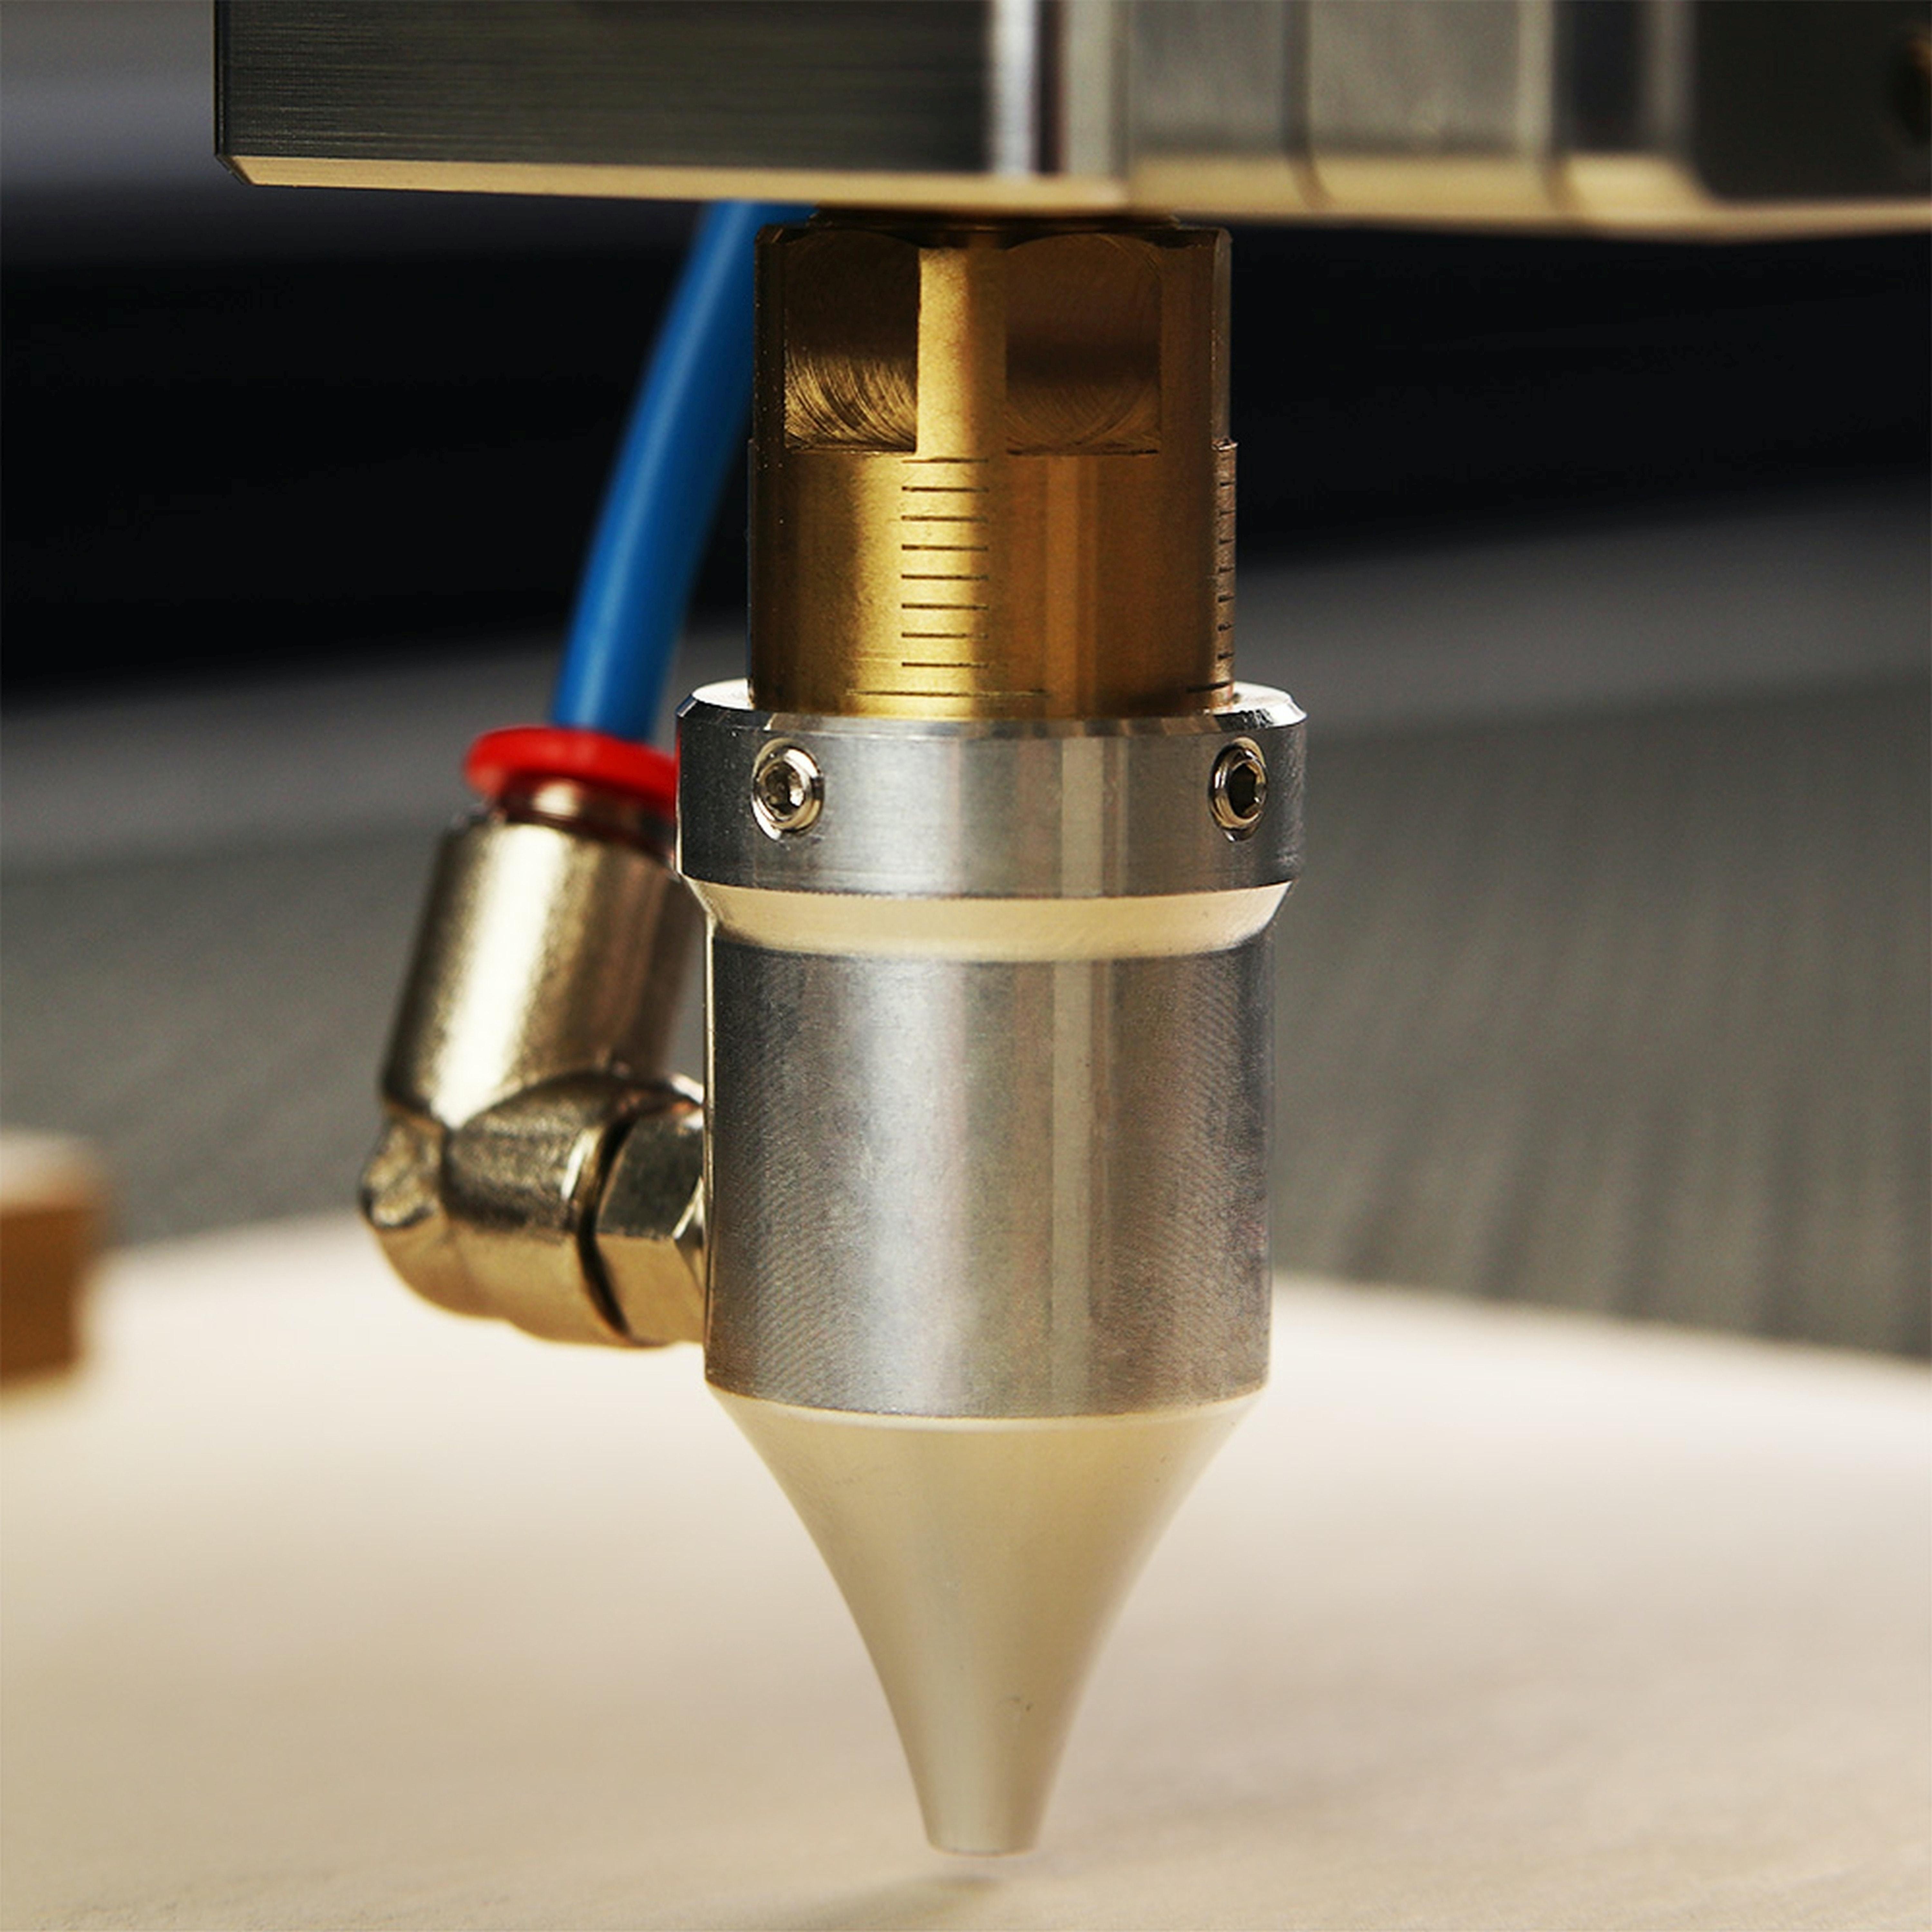
Extruder Knight: Release the Tension
Now, let’s face the Extruder Knight, a brave soul responsible for gripping and guiding the filament. To grant access to the filament, you must release its iron grip by pressing the lever or tension arm. Show the Extruder Knight your gentle touch, and it shall reward you with the freedom to remove the filament.
The Heroic Act of Loading New Filament
Inserting New Filament with Finesse
Huzzah! The moment has come to usher in your new filament hero. With the Extruder Knight’s guidance, gently feed the fresh filament through the entrance of the extruder. Remember, precision and finesse are key here. Once the filament reaches the nozzle, you can secure it in place with the Extruder Knight’s iron grip.
Extrusion Activation: “E” is for Extrusion
Now, we must breathe life into our new filament companion. Navigate to your Ender 5’s control panel, and activate the extrusion command, typically denoted by the letter “E.” This command will encourage the filament to flow through the nozzle and prime itself for the printing adventures that await.
Congratulations, intrepid 3D printing enthusiast! You have conquered the noble art of changing filament on your Ender 5. Take a moment to revel in the triumph, for you are now a true master of the printer realm. Let this guide serve as your trusty sidekick on future filament-changing quests. May your prints be flawless, and may your filaments always be eager to join the creative journey. Happy printing!
To infinity and filament change!
FAQ: How To Change Filament Ender 5
Welcome to our comprehensive FAQ guide on how to change filament on the Ender 5 3D printer! Whether you’re a beginner or experienced user, understanding the process of changing filament is essential for successful 3D printing. In this guide, we’ll address common questions and provide step-by-step instructions to make the process a breeze. So, let’s dive in and tackle those filament change challenges!
Table of Contents
- Why does filament keep getting stuck?
- What temperature should PLA be printed at?
- Can you use a 3D printer with a phone?
- How do I connect my computer to a 3D printer?
- How do you load and unload filament?
- How do you change the filament on a 3D printer?
- How do you fix filament jam?
- How do you remove a tube filament?
- How do you stop filament grinding?
- How do you change filament on Cura?
- How do you remove PLA from nozzles?
- Why do nozzles clog?
- How do you remove filament?
- How do I connect my Ender 5 to my computer?
- Do I remove filament after printing?
- How do I set up my Cura printer?
- How do you change filaments in Ender 5?
- How do you change the filament in the middle of a print?
Why does filament keep getting stuck
Filament getting stuck can be frustrating! There are a few common reasons for this issue:
- Check if the nozzle is clogged.
- Ensure the filament is properly inserted and not tangled.
- Calibrate the printer’s extruder to ensure smooth filament feeding.
- Make sure the hot end is at the appropriate temperature for the filament being used.
What temperature should PLA be printed at
PLA (Polylactic Acid) is commonly printed at temperatures ranging from 180°C to 220°C. However, it’s important to reference the manufacturer’s recommendations for the specific PLA filament you’re using. Finding the optimal temperature will result in better print quality and adhesion.
Can you use a 3D printer with a phone
While it may sound convenient, using a 3D printer directly with a phone is not a common method. Typically, 3D printers are controlled using a computer or through a dedicated LCD screen attached to the printer itself. However, there are software and apps available that allow remote monitoring and control of 3D printers from a smartphone or tablet.
How do I connect my computer to a 3D printer
To connect your computer to a 3D printer, follow these steps:
- Install appropriate printer drivers on your computer.
- Connect the printer to your computer via USB or Wi-Fi.
- Open the slicing software.
- Load your 3D model into the software.
- Configure print settings, such as layer height and print speed.
- Slice the model to generate the G-code.
- Finally, send the sliced G-code to your printer.
How do you load and unload filament
Loading and unloading filament is a crucial part of the filament change process. Follow these steps:
- Preheat the nozzle to the recommended temperature for the filament.
- Cut the end of the filament at a slight angle, making it easier to insert.
- On your printer’s LCD screen or control panel, find the filament loading/unloading option.
- For loading, insert the filament into the filament inlet or extruder, applying slight pressure until it feeds.
- For unloading, select the option and wait for the filament to retract. Once retracted, gently pull out the filament.
How do you change the filament on a 3D printer
To change filament on a 3D printer:
- Preheat the nozzle to the printing temperature of the current filament.
- Unload the current filament following the steps mentioned above.
- Cut the end of the new filament at a slight angle.
- Load the new filament by following the steps mentioned above.
- Once the new filament extrudes smoothly, you’re ready to start printing!
How do you fix filament jams
Filament jams are a common headache for 3D printer users, but not to worry! Follow these steps to fix a filament jam:
- First, stop the print and allow the printer to cool down.
- Remove any remaining filament from the extruder.
- Heat the nozzle to the recommended temperature for the filament.
- Use a small tool, like a needle or unclogging filament, to gently push and clear any clogs.
- Once cleared, reload the filament and resume your print.
How do you remove a tube filament
Removing tube filament from the Ender 5 can be straightforward if you follow these steps:
- Heat the nozzle to the recommended temperature for the filament.
- Locate the coupler that connects the tube to the extruder.
- Depress the retaining collet on the coupler and simultaneously pull the tube away from the extruder.
- Once disconnected, gently pull the tube out, removing the filament.
How do you stop filament grinding
Filament grinding can occur when the filament gets stuck and the extruder gear grinds it instead of smoothly feeding it. Here’s how to prevent filament grinding:
- Ensure the filament path is clear without any obstructions.
- Check that the extruder tension is properly calibrated; it should grip the filament firmly but not overly tight.
- Keep the nozzle clean and free from debris to avoid clogs that can lead to filament grinding.
How do you change filament on Cura
To change filament using Cura software, follow these steps:
- Open Cura and load your desired 3D model.
- Navigate to the “Print Setup” or “Preferences” menu.
- Find the “Filament” section and select “Change Filament” or a similar option.
- Follow the on-screen prompts to unload the current filament.
- Once unloaded, cut the end of the new filament at a slight angle and load it using the prompts.
- Finally, confirm the filament change and proceed with your print.
How do you remove PLA from nozzles
If you need to remove PLA from the nozzle, try these steps:
- Heat the nozzle to the temperature at which PLA filament prints.
- Using tweezers or pliers, gently pull the softened PLA from the nozzle.
- Be cautious not to apply excessive force or damage the nozzle during this process.
Why do nozzles clog
Nozzles can clog due to various reasons, such as:
- Accumulated debris or burnt filament.
- Poor quality or contaminated filament.
- Incorrect temperature settings.
- Printing at high speeds with inadequate cooling.
How do you remove filament
Removing filament from the Ender 5 is simple. Just follow these steps:
- Heat the nozzle to the printing temperature of the filament you wish to remove.
- Using the control panel or software, select the “Unload Filament” option.
- Once the filament is retracted, gently pull it out from the extruder.
How do I connect my Ender 5 to my computer
To connect your Ender 5 to your computer, follow these steps:
- Ensure your computer has the necessary drivers installed for the printer.
- Connect one end of the USB cable to the printer and the other end to your computer.
- Power on your printer and computer.
- Wait for the computer to recognize the printer and establish a connection.
- Launch your preferred slicing software and begin printing!
Do I remove filament after printing
It’s generally a good practice to remove filament from the printer after each print job. This prevents filament from sitting in the hot end and potentially causing clogs or other issues. Additionally, it allows for easier filament change when starting a new print.
How do I set up my Cura printer
To set up your printer in Cura, follow these steps:
- Open Cura and go to the “Printers” menu.
- Click on the “Add Printer” option.
- Select your printer from the list of available options.
- Provide any additional information or settings requested by the setup wizard.
- Confirm the printer setup and you’re ready to start slicing and printing!
How do you change filaments in Ender 5
Changing filaments on your Ender 5 is simple by following these steps:
- Preheat the nozzle to the printing temperature of the current filament.
- Unload the current filament following the steps mentioned above.
- Cut the end of the new filament at a slight angle.
- Load the new filament following the steps mentioned above.
- Once the new filament extrudes smoothly, you’re ready to start printing!
How do you change the filament in the middle of a print
To change the filament in the middle of a print on the Ender 5, here’s what you can do:
- Pause the print using either the control panel or software.
- Follow the steps mentioned above to unload the current filament.
- Cut the end of the new filament at a slight angle.
- Load the new filament following the steps mentioned above.
- Resume the print and watch as your model continues with the new filament!
Congratulations on making it to the end of our comprehensive FAQ guide on changing filament in the Ender 5 3D printer! We hope this guide has provided you with the information and solutions you were seeking. Remember, mastering the filament change process is a valuable skill that will enhance your 3D printing experience. Happy printing and may your filament swaps be seamless!