If you own a pool, you know that proper maintenance is crucial to keeping the water clear and inviting. One important aspect of pool maintenance is opening the pool filter lid. Whether you have an above ground pool or an in-ground one, knowing how to properly remove the filter lid is essential.
In this comprehensive guide, we will walk you through the process of opening a pool filter lid, step-by-step. We’ll also address common questions related to pool maintenance, such as how to remove a stuck skimmer basket or prime your pool pump. By the end of this article, you’ll have the knowledge you need to confidently tackle any pool maintenance task.
So, grab your sunscreen and let’s dive in to learn the ins and outs of opening a pool filter lid and other important pool maintenance tips!
How to Easily Open Your Pool Filter Lid and Dive into Crystal Clear Water
Every pool owner knows the feeling of anticipation when it’s time to take a refreshing dip in the cool water. But before you can splash around like a happy dolphin, there’s one small hurdle standing in your way – opening the pool filter lid. Don’t worry, my friend, because I’m here to guide you through this mystical process with all the finesse of a synchronized swimmer.
Let’s Get Our Hands Dirty—Gentleman, Start Your Engines!
- Gearing Up Like a Pool Filter Gladiator: Don your pool filter opening armor—safety goggles, gloves, and a deep breath of determination.
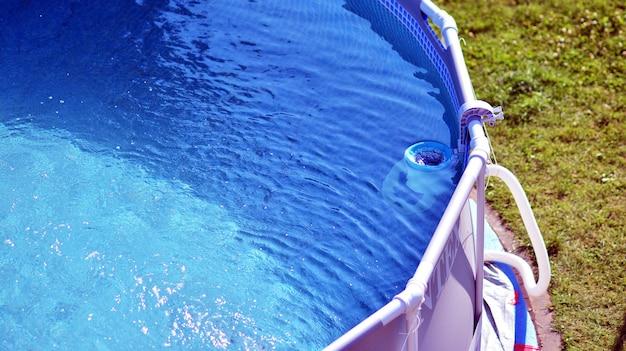
- Finding the Sneaky Lid: First, turn off your pool pump—no need for it to join the party. Next, put your pool filter detective skills to use and locate the sneaky lid. It usually hides near the pool pump, nervously waiting for its big reveal.
- Loosening the Beast: Time to loosen that stubborn lid. Wrap your mighty grip around the lid’s handle and twist it like you’re opening the pickle jar of fate. If it refuses to budge, show it who’s boss with a gentle tap on the side using a rubber mallet or the flat end of a screwdriver. Remember, it’s all about asserting dominance with a touch of finesse.
- Arm Wrestling with Resistance: Sometimes, the pool filter lid decides it’s in a wrestling mood. If it puts up a good fight, don’t be discouraged—grab a jar opener, wrap it around the lid for an extra grip, and let the jousting begin. You’re the pool champion, after all!
What Lies Beneath? A Glimpse into the Filter Wonderland
Once you’ve triumphantly opened the lid, you’ll be greeted by a wonderland of pool filters. Think of it as unlocking the door to a secret underwater adventure. Take a moment to admire the inner workings of your filtration system before proceeding to the next steps.
1. Gently Skimming the Surface: Remove any debris or leaves from the top of the pool filter. It’s like brushing your pool filter’s gorgeous hair—remove any tangles or unwanted guests before the real pampering begins.
2. Unscrewing the Basket: Many pool filters have a handy-dandy basket that requires your attention. Unscrew it, much like unscrewing a lush bottle of sunscreen, and greet the accumulated debris with a triumphant smile. Emptying the contents into the trash will make both you and your pool filter feel brand new.
3. Inspecting the Filter Cartridges: Ah, the filter cartridges—the unsung heroes of your pool’s cleanliness. Give them a gentle pat on the back as you remove them for inspection. If they look worn or damaged, it might be time to replace them—a bit like saying goodbye to an old pair of swimming goggles.
The Grand Finale: Putting the Lid Back On (No, Not the Cookie Jar!)
After nurturing your pool filter back to health, it’s time to reunite it with its trusty lid. Follow these simple steps to ensure a flawless finish:
-
Cleaning the Lid: Give the lid a quick wipe with a clean, damp cloth—a gesture of gratitude for its cooperation. Let the lid know it has played its part in your aquatic adventures.
-
Placing the Lid with Care: Align the lid’s groove with the corresponding grooves on the filter. It’s like fitting together two perfect puzzle pieces. Once aligned, press down gently, and hear that satisfying click—the sound of success.
-
Tighten the Lid: Grip the lid’s handle once again and twist it clockwise. Just like a hot date, you want it snug but not too tight. Overdoing it could result in a lid that refuses to let you in next time.
With the lid secured, rejoice in your victory over the pool filter opening challenge. Your reward awaits—sparkling, crystal-clear water that calls to you like a siren of freshness.
Now, go forth and make a splash, my friend!
FAQ: How to Open Pool Filter Lid
How do you remove an above ground pool skimmer?
To remove an above ground pool skimmer, start by turning off the pool pump and closing the return valve. Then, unscrew the skimmer lid counterclockwise and lift it off. Next, use a skimmer net to remove any debris or leaves from inside the skimmer basket. Finally, reattach the skimmer lid by screwing it back on clockwise until it is securely in place.
How full of water should a pool sand filter be?
Ideally, a pool sand filter should be filled with water up to the “filter level” mark. This ensures that the filter can operate efficiently and effectively. It’s essential not to overfill or underfill the filter. If the water level is too low, the system may not function correctly, while an excessively high water level can put undue pressure on the filter and cause damage.
How does a pool leaf catcher work?
A pool leaf catcher is a fantastic tool that helps prevent leaves, debris, and other larger particles from entering your pool’s filtration system. This handy contraption connects to the pool’s skimmer or pump, acting as a pre-filtering mechanism. The leaf catcher captures leaves and debris in a mesh bag, allowing you to easily remove them without clogging your pool’s main filter. It’s a simple yet effective way to keep your pool clean and maintain a healthy filtration system.
How do I remove the tight lid on my pool pump?
If you’re struggling with a tight lid on your pool pump, fear not! Here’s a pro tip to make the removal process a breeze. Start by grabbing a rubber mallet or a soft-faced hammer. Give the lid a few gentle taps around the edges. This helps to loosen the seal without causing any damage. Once you’ve done this, try unscrewing the lid again. It should now come off more easily. Remember not to use excessive force as it may lead to breakage or damage to the lid or pump.
How do I prime my Intex pool pump?
Priming an Intex pool pump is a relatively straightforward process. Here’s a step-by-step guide to help you out:
- Start by ensuring that the pool pump is turned off.
- Remove the pump’s lid and fill the pump chamber with water.
- Reattach the lid securely, making sure it forms a tight seal.
- Open the air release valve on top of the filter housing.
- Turn on the pump and let it run for a few minutes.
- Once you see a steady stream of water coming out of the air release valve, close it.
- Your Intex pool pump is now primed and ready to go!
How often should I clean my pool pump basket?
To maintain optimal performance, it’s recommended to clean your pool pump basket at least once a week during peak pool season. However, the frequency may vary depending on factors like the size of the pool, the number of swimmers, and the surrounding environment. If you notice reduced water flow or an increase in debris inside the pump basket, it’s a good indication that it’s time for a cleaning. A clean pump basket ensures proper filtration and helps extend the lifespan of your pool equipment.
How do you open a skimmer basket?
Opening a skimmer basket is a simple task. Follow these steps:
- Turn off the pool pump to ensure there’s no suction.
- Locate the skimmer basket, which is usually built into the side of the pool.
- Lift the lid of the skimmer basket by pulling up or twisting it counterclockwise, depending on the design.
- Carefully remove the skimmer basket from its housing.
- Inspect the basket for any debris, leaves, or other foreign objects. Remove and clean them if necessary.
- After cleaning, place the skimmer basket back in its housing and secure the lid in place.
Why won’t my pool pump come on?
If your pool pump refuses to come on, there could be several possible reasons:
- Check the power supply: Ensure that the pump is plugged in and that the circuit breaker or fuse hasn’t tripped.
- Examine the timer settings: Make sure the pump’s timer is set correctly. It’s possible that the timer is preventing the pump from turning on.
- Inspect the motor: If there’s no power reaching the pump motor, it may need to be repaired or replaced.
- Consider the pressure switch: A faulty pressure switch can disrupt the power supply to the pump. Consult a professional to have it checked.
- Check for clogged lines or valves: Debris or a closed valve could be preventing water flow, triggering a safety mechanism that stops the pump from turning on.
If you’ve checked these common issues and the pump still won’t start, it’s advisable to contact a pool professional for further assistance.
How do I prime my Hayward Pro Series pool pump?
Priming a Hayward Pro Series pool pump is crucial for optimal performance. Follow these steps:
- Start by turning off the pool pump.
- Remove the pump lid and ensure the strainer basket is clean and free from debris.
- Fill the strainer basket with water until it overflows slightly.
- Replace the pump lid securely, making sure it forms a tight seal.
- Open the air relief valve located on top of the filter tank.
- Turn on the pump and wait for the water to flow steadily from the air relief valve.
- Once a steady stream of water is observed, close the air relief valve.
- Congratulations! Your Hayward Pro Series pool pump is now successfully primed.
How do I remove Hayward strainer housing?
Removing the Hayward strainer housing is a simple process. Here’s what you need to do:
- Turn off the pool pump and ensure the power supply is disconnected for safety.
- Release any pressure in the system by turning the air relief valve counterclockwise to let out any trapped air.
- Loosen the clamp securing the strainer housing to the pump body using a screwdriver or wrench. Rotate the clamp counterclockwise until it can be easily lifted off.
- Gently pull the strainer housing away from the pump body, using caution not to damage any connected pipes or wires.
- The Hayward strainer housing is now removed and ready for cleaning, repair, or replacement.
Why would a pool pump lose its prime?
Several factors can cause a pool pump to lose its prime:
- Air leaks: If there are any leaks in the suction line or pump connections, air can enter the system and disrupt the prime.
- Debris in the impeller: A clogged or obstructed impeller can prevent the pump from pulling water effectively, resulting in a loss of prime.
- Low water level: If the water level in the pool drops too low, the pump may struggle to maintain its prime.
- Blockage in the suction line: A blockage caused by leaves, twigs, or other debris can impede water flow and lead to a loss of prime.
- Worn gaskets or o-rings: Over time, gaskets and o-rings can deteriorate, causing air to enter the system and disrupt the prime.
Identifying and addressing these issues will help maintain a consistent prime and keep your pool pump running smoothly.
How do you remove a stuck skimmer basket?
Removing a stuck skimmer basket can be a bit challenging, but fear not! Try these tips:
- Use a lubricant: Apply a lubricant like silicone spray or a lubricating gel around the rim of the skimmer basket. Allow it to sit for a few minutes to penetrate the tight seal.
- Utilize gentle force: Gently tap or lightly hit the sides of the basket with a rubber mallet or a soft-faced hammer. Be cautious not to damage the skimmer or injure yourself.
- Twist and wiggle technique: Attempt to twist the skimmer basket counterclockwise while applying upward pressure. Simultaneously wiggle it back and forth to loosen the basket from its housing.
- Seek professional help: If all else fails, it’s best to call a pool professional who can apply the necessary tools and experience to safely remove the stuck skimmer basket without damaging any parts.
Do you remove skimmer basket when vacuuming the pool?
No, you don’t need to remove the skimmer basket when vacuuming the pool. The skimmer basket serves as a primary filter, preventing larger debris from entering the pump and filter system. When vacuuming, you should attach the vacuum head to a telescopic pole and connect it to the skimmer or a dedicated vacuum port. The skimmer basket will catch any debris or leaves before they can reach the pump or filter, saving you the trouble of cleaning them out later. Remember to occasionally check and empty the skimmer basket as needed while vacuuming to ensure optimal suction and efficiency.
Why does my skimmer door get stuck?
A skimmer door can get stuck due to various reasons, including:
- Debris or objects obstructing the door: Objects like leaves, twigs, or pool toys can get caught in the skimmer door, preventing it from freely moving. Regularly clean the skimmer area to avoid such obstructions.
- Damaged or worn skimmer door springs: The springs that facilitate the opening and closing of the skimmer door may become weakened or damaged over time, causing it to get stuck. In such cases, replacing the springs can resolve the issue.
- Misalignment or warping: Extreme weather conditions or aging can cause the skimmer door or the surrounding frame to become misaligned or warped, leading to difficulties in opening or closing. Adjusting or replacing the door and realigning the frame can help resolve the problem.
If your skimmer door keeps getting stuck despite these troubleshooting efforts, it may be best to consult a pool professional for further inspection and assistance.
How do I turn my Hayward pool pump on after winter?
To turn your Hayward pool pump on after winter, follow these steps:
- Inspect the pump and surrounding area: Check for any visible damage, loose or disconnected parts, or signs of wear. Remove any debris or obstructions from the pump area.
- Reconnect any disconnected components: Ensure all connections, hoses, and valves are properly connected and tightened.
- Remove winterizing plugs: If you used winterizing plugs to seal any openings, remove them carefully and replace any drain plugs.
- Prime the pump: Remove the pump lid and fill the strainer basket with water until it overflows slightly. Replace the lid securely, making sure it forms a tight seal.
- Open up valves: Ensure all necessary valves, such as the main drain and skimmer valves, are open to allow proper water flow to the pump.
- Turn on the power: Restore power to the pool pump by plugging it in or turning on the circuit breaker.
- Start the pump: Switch on the pump and listen for signs of normal operation. You should see water circulating within a few moments.
- Monitor for any issues: Keep an eye on the pump and filtration system for any unusual sounds, leaks, or other irregularities. Address any problems promptly to prevent further damage.
How much water should I put in my sand filter?
Maintaining the correct water level in your sand filter is crucial for optimal performance. It’s recommended to fill the filter tank until the water level reaches the “filter level” mark indicated on the filter housing. This ensures sufficient water inside the filter to facilitate proper filtration and prevent air from entering the system. Avoid overfilling the filter tank, as it can lead to decreased filter efficiency and potential damage to the equipment.
What are the two holes in the bottom of a pool skimmer?
The two holes in the bottom of a pool skimmer play essential roles in the pool’s circulation system.
-
Primary hole: The larger hole in the middle of the skimmer bottom is the main intake hole. It draws water from the pool, skimming off debris and leaves, which then flow into the skimmer basket. From there, the water is directed to the pump for filtration.
-
Secondary hole: The smaller hole, typically located adjacent to the primary hole, is the overflow or equalizer hole. Its purpose is to regulate water flow and maintain an appropriate water level within the skimmer. This hole prevents the skimmer from pulling in excess air or losing prime in case of fluctuating water levels caused by heavy use, evaporation, or chemical treatments.
Understanding the function of these holes helps ensure efficient operation of the skimmer and proper pool circulation.
How full do you fill a pool sand filter?
To ensure proper functionality, you should fill a pool sand filter until it reaches the designated “filter level” mark indicated on the filter housing. It’s important not to overfill or underfill the filter. Overfilling can put strain on the system and potentially damage the equipment, while underfilling may lead to inadequate water filtration. Following the manufacturer’s instructions and guidelines for your specific sand filter model is highly recommended.
How do I start my pool pump after winter?
When starting your pool pump after winter, it’s crucial to follow these steps:
- Inspect the pump and surrounding components for any visible damage or wear.
- Reconnect any hoses or valves that may have been disconnected during winterizing.
- Ensure drain plugs are replaced, valves are in proper position, and any winterizing plugs are removed.
- Prime the pump by filling the strainer basket with water until it overflows slightly. Replace the lid securely.
- Open all necessary valves to allow water flow to the pump.
- Restore power to the pump by plugging it in or turning on the circuit breaker.
- Turn on the pump and listen for normal operation noises. Water should begin circulating within a few moments.
- Monitor the pump and filtration system for any leaks, irregular sounds, or other potential issues. Address any problems promptly to prevent further damage.
By following these steps, you’ll ensure a smooth and successful start to your pool pump after the winter season.