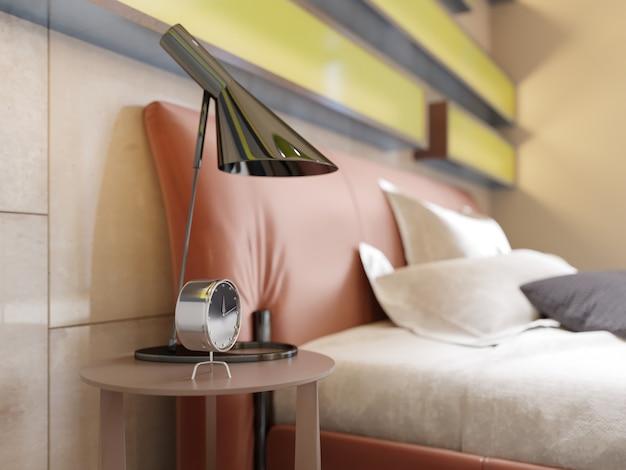
Is your leather headboard showing signs of wear and tear? Don’t fret! With a little know-how and some basic repair techniques, you can bring back its original beauty and extend its lifespan. Leather headboards not only add a touch of luxury to your bedroom but also provide comfort and support while you relax or read before bed.
In this blog post, we will guide you through the process of repairing a leather headboard, addressing common issues such as torn upholstery, peeling faux leather, and cracked surfaces. We’ll also explore the difference between genuine leather and bonded leather, and whether your headboard can be reupholstered. So, if you’re ready to give your leather headboard a much-needed makeover, let’s dive in!
But how do you stop faux leather from peeling? Can peeling leather be repaired? Is there a glue specifically designed for leather? How much does it cost to reupholster a headboard? We’ll answer all these questions and more, providing you with practical solutions to bring back the charm of your leather headboard. So, get ready to roll up your sleeves and let’s embark on this restoration journey together!
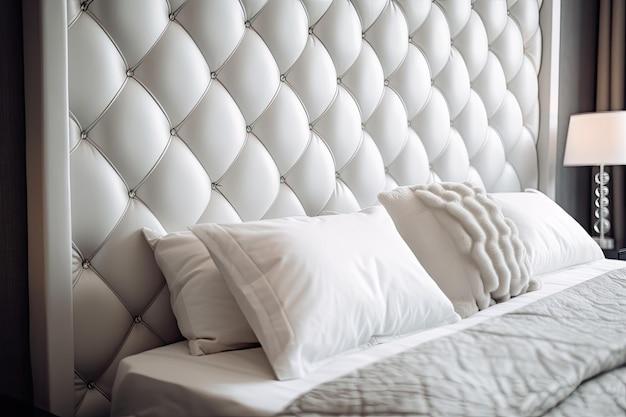
Table of Contents
- Understanding Leather and Bonded Leather
- Assessing the Damage: Common Issues with Leather Headboards
- How to Repair a Torn Headboard Upholstery
- Preventing and Fixing Peeling Faux Leather
- Dealing with Cracked Leather: Causes and Solutions
- Reupholstering a Leather Headboard: A Cost-Effective Solution
- Enhancing the Aesthetics: Tufting an Existing Headboard
- The Magic of Leather Fillers: Restoring Texture and Appearance
- Protecting Your Leather: Understanding Leather Sealers
- Conclusion
Stay tuned as we guide you step by step through each process, offering expert advice and tips to ensure your leather headboard looks as good as new. Let’s get started on this exciting journey of leather restoration!
How to Easily Repair a Leather Headboard
So, you’ve got a beautiful leather headboard that’s seen better days? Don’t worry, we’ve got you covered! In this guide, we’ll walk you through the steps of repairing your leather headboard like a pro. No need to panic or think about replacing it just yet. With a little love and care, your favorite piece of furniture will look as good as new.
Assessing the Damage: CSI – Crime Scene Investigation
Before jumping into action, take a close look at your leather headboard. It’s time to put your detective hat on and examine the extent of the damage. Is it a minor scratch, a torn area, or just a faded spot? Knowing the severity of the “crime” will help you determine the best course of action. It’s like being your own CSI investigator, minus the forensic labs and dramatic music.
Gathering Your Tools: The Leather Repair Avengers
Once you’ve assessed the damage, it’s time to gather your tools and assemble your very own team of leather repair avengers. First on the list is your trusty sidekick, a leather repair kit specifically designed for upholstery repairs. Make sure it contains all the essentials like adhesives, colorants, and repair compounds. You might also need a sharp pair of scissors, sandpaper, leather cleaner, and a microfiber cloth. With your team by your side, you’re ready to take on any leather headboard disaster!
Cleaning the Crime Scene: Removing Dirt and Grime
Before diving into the repairing process, let’s clean up the crime scene. Grab your leather cleaner and the microfiber cloth, and gently wipe down your headboard. This will remove any dirt, dust, or oils that might interfere with the repair. As you clean, remember, even headboards need pampering sometimes. It’s like giving your detective partner a spa retreat after a long day of chasing criminals. They’ll thank you later!
Patching Up the Wounds: Surgical Precision Required
Now that your leather headboard is squeaky clean, it’s time for some surgical precision. If the damage is a small scratch or a tiny tear, patching it up is relatively straightforward. Cut a small piece of leather from a hidden area, like the back of the headboard or an inconspicuous spot, and use a leather adhesive to attach it to the damaged area. Smooth out any wrinkles or air bubbles, just like a seasoned surgeon would.
Creating a Seamless Blend: A Picasso in Leather Restoration
If the damage to your headboard is more noticeable, you’ll have to channel your inner Picasso and get creative. Use sandpaper to gently sand down the damaged area, ensuring a smooth surface for the next steps. Then, depending on the color and finish of your headboard, carefully apply a matching leather colorant in thin layers, building up the color gradually. Remember, patience is key. You want the repair to blend seamlessly, just like a hidden treasure in a Picasso painting.
The Final Touch: Protecting Your Masterpiece
Congratulations, you’ve successfully repaired your leather headboard! But wait, there’s one more thing to do – protecting your masterpiece. Apply a leather conditioner or protector to keep your headboard looking fabulous and to prevent future damage. Think of it like a superhero costume for your headboard, shielding it from spills, stains, and everyday wear and tear. You’re now the proud owner of a restored leather headboard, and you’ve officially become a master in the art of repairing furniture. Bravo!
Now that you have all the tips and tricks up your sleeves, you can proudly showcase your leather headboard to your friends and family, and share the story of how you became a DIY superhero. Who needs a professional when you’ve got a sense of humor and a guide like this? Remember, a little ingenuity goes a long way when it comes to leather headboard repair. Happy restoring!
FAQ: How To Repair Leather Headboard
Welcome to our comprehensive FAQ-style guide on repairing leather headboards. Whether you have a luxurious genuine leather headboard or an affordable faux leather one, we’ve got you covered. From preventing peeling to fixing rips and reupholstering, we’ll address all your burning leather headboard questions with a touch of humor. So, grab a cup of coffee, sit back, and let’s dive into the world of leather headboard repair!
How do you stop faux leather from peeling
Oh, the dreaded peeling faux leather! It’s like witnessing a snake shedding its skin, but much less fascinating. To prevent this fashion faux pas, follow these simple steps:
- Avoid direct sunlight: Faux leather can’t handle the sun’s relentless love. Keep your headboard away from those UV rays.
- Stay hydrated: Moisturize your headboard with a leather conditioner regularly. It’s like giving your headboard some well-deserved spa treatment.
- Delicate cleaning: Use a mildly soapy solution and a soft cloth to gently clean your faux leather headboard. Treat it like a fragile art piece – with love and care.
Can peeling leather be repaired
Absolutely! Just because your leather headboard decided to molt doesn’t mean it’s destined for the furniture graveyard. Here’s what you can do:
- Clean the area: Start by cleaning the peeling area with a mild leather cleaner. We don’t want any dirt or grime getting in the way of repairs.
- Patching up: Apply a leather repair adhesive under the peeling section and press it down firmly. Smooth it out like it’s your ironing skills on a Sunday evening.
- Finishing touches: Seal the repaired area with a leather finish or conditioner to make it blend seamlessly. Voila! Your headboard is looking suave once again!
How do you fix a ripped headboard
Oh no, a rip in your headboard! It’s like finding out your favorite politician is a closet accordion player. But fear not, here’s how you can fix it:
- Assess the damage: Determine the size and severity of the rip. If it’s a small tear, you might be able to fix it at home. If it’s bigger than Texas, it’s best to call in the professionals.
- Leather patch to the rescue: For small tears, cut a leather patch slightly larger than the rip. Apply a leather repair adhesive to the patch and press it firmly over the tear. Show that rip who’s boss!
- Blend and buff: Once the patch is in place, use a leather finish to blend it with the rest of the headboard. Give it a light buffing, and your headboard will be looking flawless – no more embarrassing rips!
Is there a glue for leather
Oh, absolutely! There’s glue for everything nowadays. When it comes to leather headboard repairs, a quality leather adhesive is your best friend. Look for adhesives specifically designed for leather. They’re like the superhero of the adhesive world, saving your headboard from the clutches of destruction.
Can a headboard be reupholstered
Indeed, it can! Sometimes, a headboard just needs a new look to match your evolving taste. Reupholstering is the magic wand that can transform your headboard into a whole new beast. Here’s how it works:
- Choose your fabric wisely: Select a fabric that’s suitable for upholstery purposes, ensuring durability and style go hand in hand.
- Strip it down: Remove any existing fabric or filling from the headboard, like you’re unveiling its hidden secret.
- Let it shine: Add a layer of foam padding for comfort before wrapping your headboard in the chosen fabric. Stretch it taut and secure it like you’re wrapping a present on Christmas morning.
- Finishing touches: Attach the fabric to the back of the headboard neatly, like a hotel bedsheet tucked in with precision. Admire your revamped headboard – it’s like Cinderella’s transformation, but with less pumpkin and more fabric!
What is the difference between leather and bonded leather
Ah, the classic leather confusion. Let’s clear the air and highlight the contrast between these two:
- Leather: This beauty is the real deal – genuine, authentic, and aging like a fine wine. It’s made from animal hides, tanned to perfection, and exudes luxury. Genuine leather is nature’s way of saying, “I’ve got you covered.”
- Bonded Leather: Think of it as a leather Frankenstein creation. It’s made from leftover bits of genuine leather combined with synthetic materials. While it contains some real leather, it’s not as durable or luxurious as the 100% real deal. Bonded leather is like a leather-inspired superhero costume, close but not quite the real thing.
Can leather furniture be repaired
Absolutely! Leather furniture repair is like a spa day for your cherished pieces. Whether it’s a headboard, couch, or ottoman, you can wave your repair magic wand and make it look brand new. From small scratches to deep cuts, professionals can work their leather restoration spells and save the day. So, don’t give up on your beloved leather furniture just yet!
How do you tuft an existing headboard
Ah, tufting – the art of creating cozy nooks in your headboard. Here’s how you can transform your plain Jane headboard into a buttoned-up beauty:
- A button enchantment: Decide on your tufting pattern and measure out the positions for the buttons. Mark those spots like you’re playing headboard darts, but without the danger.
- Make holes, not enemies: Using a tufting needle, create holes through the headboard fabric at the marked spots. Think of it as piercing the fabric’s ears, but far less painful.
- Crown it with a button: Attach buttons through the holes, pulling them tightly to create that plush tufting effect. Secure the buttons in place like a royal crown – your headboard is now fit for a queen!
What is leather filler made of
Leather filler, the hero that saves your leather headboard from unsightly gaps and holes. This magical concoction is typically made from a mix of:
- Leather fibers: These are finely ground leather pieces. Think of them as the fairy dust that blends seamlessly into the gaps, making them disappear.
- Adhesive: A special glue keeps everything together, bonding the fibers and creating a solid foundation.
- Color pigments: Sometimes, the filler comes pre-mixed with pigments, ensuring a perfect match for your headboard’s hue. It’s like the furniture version of the skin-matching foundation!
Does real leather peel off
Nope, real leather doesn’t peel off like a cheap nail polish job. If your leather headboard is shedding like a snake with an identity crisis, chances are it’s not genuine leather. Genuine leather ages gracefully, developing a patina that tells a story. So, if your headboard is peeling, it’s time to unmask the impostor.
What causes cracked leather
Cracked leather is like the grand entrance of wrinkles – a sign of aging but without the wisdom. Several factors can lead to cracked leather, including:
- Lack of moisture: Similar to your skin, leather needs hydration. Dry conditions and neglect can suck the life out of your headboard, leaving behind unsightly cracks.
- Excessive heat: Leather and heatwaves don’t mix well. High temperatures can cause the leather to dry out, crack, and lose its supple nature.
- Poor quality: Inferior leather or improper tanning methods during production can result in an early onset of cracking. It’s like buying a shiny new toy that breaks moments later – a letdown of epic proportions.
Is there a sealer for leather
Indeed, there is! Think of a leather sealer as a shield, protecting your precious headboard from the elements. It forms a transparent barrier, like a forcefield against spills, stains, and daily wear and tear. Just like sunscreen for your headboard, it keeps the harmful rays away and ensures your leather stays looking fabulously youthful for years to come.
What causes faux leather peeling
Ah, faux leather – the imitator that sometimes falls apart. Here are a few reasons why it decides to shed its skin:
- Cheap materials: Poor-quality faux leather lacks the durability of its genuine counterpart. When it comes to faux, splurging a little extra can save you from a peeling nightmare.
- Wear and tear: Excessive rubbing, furniture shuffling, and everyday use can cause faux leather to degrade and peel. Treat your headboard with care, like you’re handling a fragile ego – no rough stuff!
- Human error: Improper cleaning methods or using harsh chemicals can strip faux leather of its protective coating. It’s like hiring a bull to run through a china shop – not good for anyone involved.
How do you repair torn upholstery
When it comes to torn upholstery, a few simple steps can take it from shabby to chic:
- Assess the damage: Determine the size and severity of the tear. Small tears might be fixable at home, while larger ones might require professional intervention.
- Patch it up: For small tears, cut a fabric patch slightly larger than the tear. Use a fabric adhesive to attach the patch, ensuring it covers the tear completely.
- Camouflage is key: If the patch stands out like a sore thumb, consider covering the entire headboard with a new fabric. It’s like giving your headboard a fashion makeover – goodbye tear, hello trendy!
Why do headboards crack
Oh, the sound of cracking headboards – it’s like a horror movie without the jump scares. Several factors can lead to this uncomfortable situation:
- Low-quality materials: Headboards made from subpar materials lack the strength to withstand the test of time. Invest in a solid and reliable headboard to keep those unnerving cracks at bay.
- Improper installation: If your headboard isn’t properly attached to the bed frame, it can create stress points, leading to cracks. Make sure your headboard is securely fastened, like a tightly sealed secret vault.
- Moisture and temperature fluctuations: Excessive humidity, extreme temperatures, or drastic fluctuations can cause wooden headboards to expand and contract, resulting in dreaded cracks. Keep your headboard in a climate-controlled environment, and it’ll thank you with its crack-free existence.
How can I repair my leather couch
Ah, the couch, the sanctuary of relaxation and occasional snacking. To repair your beloved leather couch, follow these steps:
- Cleanse and prep: Clean the damaged area with a mild leather cleaner, removing any dirt or debris. Prepare the surface like an artist preparing a canvas – a pristine foundation for your repair masterpiece.
- Fill in the gap: Apply a leather filler to the damaged area, gently smoothing it out. It’s like giving your couch a skin graft – seamless repairs in progress!
- Color me perfect: Use a leather colorant or dye to match the repaired area with the rest of the couch. Blend it in, creating a harmonious color symphony.
- Seal the deal: Apply a leather finish or sealer to protect the repaired area and give it that showroom shine. Your couch will look as good as new, ready to face all the cozy movie nights ahead!
How much does it cost to reupholster a headboard
Ah, the cost of bringing your headboard dreams to life. The price of reupholstering can vary depending on several factors, including:
- Size of the headboard: Larger headboards require more fabric and time, affecting the overall cost.
- Fabric choice: The type and quality of fabric you choose will influence the price. It’s like ordering a fine wine at a restaurant – the price varies based on your selection.
- Professional vs. DIY: If you’re confident in your upholstery skills, going the DIY route can save you some moolah. However, professional services ensure a flawless finish, albeit at a higher cost.
While it’s always best to consult with upholstery experts for an accurate estimate, expect to set aside a few hundred dollars for a headboard reupholstering project.
Conclusion
And there you have it! We hope this FAQ-style guide provides all the answers you need to revive, repair, and reupholster your leather headboard. Remember, whether it’s peeling faux leather or crayon-drawn masterpieces on your couch, nothing is beyond repair. So, bid farewell to your headboard woes and embrace a world of endless possibilities. Happy repairing!