Are you a pottery enthusiast or a DIY lover looking to sand your pottery ceramics? If so, you’ve come to the right place! Sanding is a crucial step in pottery-making, whether you’re a beginner or a seasoned artist. In this comprehensive guide, we’ll walk you through the ins and outs of sanding pottery ceramics, addressing common questions and providing expert tips along the way.
You may be wondering, “Can I sand glazed pottery?” or “Should I sand ceramic tile before painting?” Don’t worry, we’ve got you covered. We’ll delve into these queries and more as we explore the dos and don’ts of sanding various types of pottery. Additionally, you’ll discover how to remove pottery glaze and smooth out non-hardening clay to achieve a professional finish.
So grab your sandpaper and get ready to unlock the secrets of achieving a flawlessly smooth surface on your pottery ceramics. Whether you’re aiming for a polished end result or simply want to get rid of scratches and imperfections, this guide will help you master the art of sanding pottery ceramics. Let’s dive in!
How to Smooth Out Your Pottery Ceramics Like a Pro
So you’ve just finished sculpting a beautiful piece of pottery ceramics, but now it’s time to face the next challenge – sanding. Don’t worry, though. With a little patience and the right techniques, you’ll be able to achieve a flawless, smooth finish that will make your ceramics shine. In this guide, we’ll walk you through the process of how to sand pottery ceramics like a pro.
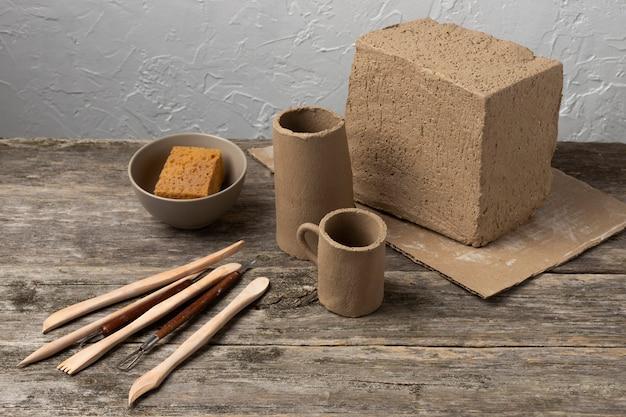
1. Gather Your Sanding Tools
Before diving into the sanding process, it’s important to have the right tools at hand. Here are a few essentials you’ll need for a successful pottery sanding session:
Sandpaper Selection
Pick out an assortment of sandpapers with different grits, starting from coarse to fine. You’ll want to begin with a lower grit, such as 80 or 100, to remove any major imperfections, and gradually work your way up to a higher grit, like 400 or 600, for a smooth finish.
Sanding Pads and Sticks
Having sanding pads or sticks in different shapes and sizes will allow you to access various nooks and crannies of your pottery ceramics. This ensures that every inch receives the love it deserves.
2. Prepare Your Workspace
Now that you have your tools ready, it’s time to set up your sanding station. Find a comfortable and well-lit area where you can work without any distractions. Make sure to lay down some newspaper or a drop cloth to prevent any unwanted mess – pottery sanding can get messy, trust me!
3. Begin with Coarse Grit Sandpaper
This step is where the real fun begins! Start by taking your coarse grit sandpaper – like a knight with a sharpened sword – and begin rubbing it gently on the surface of your pottery ceramics. Be careful not to apply too much pressure, as you don’t want to risk damaging your masterpiece.
Pro tip: Sing your favorite pottery-themed sea shanty to keep your spirits high as you sail through this sanding voyage!
4. Smooth It Out with Finer Grit Sandpaper
Once you’ve conquered the coarse grit, it’s time to bring out the big guns – or rather, the finer grit sandpaper. Switch to a higher grit and continue sanding your ceramics. You’ll notice that with each pass, the surface becomes smoother and the imperfections start to disappear.
5. Pay Attention to Details
Now that you’re approaching the final stages of the sanding process, it’s important to pay attention to the finer details. Grab your sanding pads or sticks and start focusing on those hard-to-reach areas. Whether it’s the delicate curves of a handle or the intricate patterns on the surface, take your time and give each element the attention it deserves.
6. Wash Away the Dust
Congratulations, you’ve reached the end of your sanding adventure! But before you stand back and admire your perfectly sanded pottery ceramics, don’t forget to give them a good rinse. This will wash away any lingering dust and give your creation that final touch of sparkle.
So there you have it – a handy guide on how to sand pottery ceramics like a pro. With the right tools, a dash of patience, and a sprinkle of humor, you’ll be able to transform your rough clay into a polished masterpiece. Happy sanding, fellow artisans!

FAQ: How To Sand Pottery Ceramics
Can I Sand Glazed Pottery?
Yes, you can sand glazed pottery, but you need to be careful. Glazed pottery has a shiny, protective layer, so sanding it can be a bit tricky. Start by using fine-grit sandpaper and apply light pressure. Gently sand the glazed surface in a circular motion until you achieve the desired texture. Remember to wear a mask and eye protection to avoid inhaling dust or getting particles in your eyes.
Should I Sand Ceramic Tile Before Painting?
Absolutely! Sanding ceramic tile before painting is essential to ensure a smooth and long-lasting finish. Use a medium-grit sandpaper to scuff the surface of the tile lightly. This will help the paint adhere better and prevent chipping or peeling. After sanding, make sure to clean the tile thoroughly to remove any dust or residue before applying the paint.
Is It Safe to Use Sandpaper on a Toilet Bowl?
Well, unless you want to give your toilet bowl a spa treatment, it’s best to avoid using sandpaper on it. Toilet bowls are made of delicate porcelain, and sandpaper can easily scratch the surface. Instead, use a gentle cleaner specifically designed for toilets to remove stains and grime without risking any scratches.
How Do You Keep a Ceramic Dish from Scratching?
To keep your ceramic dish from scratching, there’s a simple trick you can try: place a soft, non-abrasive liner between each dish. This could be a layer of thin fabric, silicone liners, or even good old-fashioned paper towels. The liner acts as a cushion and prevents the ceramic surfaces from rubbing against each other, reducing the risk of scratches.
What Grit Sandpaper Can You Use on Porcelain?
When it comes to sanding porcelain, it’s best to stick to a high-grit sandpaper, such as 400 to 600 grit. This finer grit helps you achieve a smooth surface without causing additional scratches or damage. Be patient and take your time—sanding porcelain requires a delicate touch and a bit of finesse.
How Do You Remove Pottery Glaze?
Oh, that stubborn pottery glaze! Removing it can be a bit of a challenge, but fear not, there’s a solution. Get yourself a specialized glaze remover from your local ceramic supply store. Apply it to the glazed areas, let it sit for the recommended time, and then gently scrape off the glaze using a plastic scraper. Remember to follow the manufacturer’s instructions and wear protective gear.
How Do You Remove Glaze from Terracotta Pots?
Removing glaze from terracotta pots requires a bit of elbow grease, but it’s doable. Start by soaking the pot in warm water for a few hours to loosen the glaze. Then, use a mixture of equal parts vinegar and water or a non-abrasive cleaner to scrub away the glaze with a soft brush or sponge. Rinse the pot thoroughly and let it dry before applying a new glaze or paint.
How Do I Make the Bottom of My Dishes Smooth?
No one wants a rough bottom, right? To make the bottom of your dishes smooth, try using a technique called “bat smoothing.” Place your dish on a potter’s wheel and, while it spins, use a metal rib or a fine-grit sandpaper to smooth out any roughness. Take your time and apply gentle pressure to achieve that desired smoothness. Your dishes will thank you!
How Do You Smooth Non-Hardening Clay?
Smooth sailing with non-hardening clay! To achieve a silky-smooth finish on your non-hardening clay projects, use a slightly damp sponge to gently smooth out any imperfections. The moisture from the sponge glides over the clay, creating a lovely, polished surface. Just remember, don’t get too carried away and turn your clay masterpiece into a shapeless blob!
What Do You Put Between Plates So They Don’t Scratch?
Ah, the annoying sound of plates scratching against each other—it’s enough to make your dining experience less appetizing. To prevent this culinary cacophony, try placing a thin layer of silicone bumpers or felt pads between your plates. These little protectors act as a barrier and keep your precious plates from rubbing each other the wrong way. Bon appétit without the scratches!
How Do You Remove Paint from Glazed Pottery?
Paint, no more! To remove paint from glazed pottery, start by soaking the object in warm, soapy water for a while. Then, use a gentle scrub brush or a plastic scraper to remove the paint. If the paint is being stubborn, you can try a specialized paint remover or a mixture of equal parts vinegar and water. Remember, be gentle, and don’t let Picasso panic—preserve the pottery!
Can You Sand Clay After Baking?
While it may sound tempting to give baked clay a spa day, sanding it afterward won’t have the desired effect. Baked clay is already hard and solid, rendering sanding ineffectual. If you do want to achieve a smoother finish, it’s best to sand the clay before you bake it. So, save the sanding for pre-baking and enjoy your perfectly crafted clay creation as-is!
How Do You Burnish Ceramics?
Get ready to give ceramics a glossy glow with the art of burnishing! To achieve that beautiful polished look, start by rubbing your ceramic piece with a smooth object such as a spoon or a polished stone while it’s still damp. Apply even pressure and work in circular motions. The friction between the surface and your burnishing tool will bring out the shine, leaving you with a piece that’s absolutely radiant.
How Do You Rough Up Ceramic Tile?
If you’re thinking of roughing up ceramic tile, you must have a wild streak of rebellion in you! But hey, we won’t judge. To achieve that desired rough texture, you can use coarse-grit sandpaper. Gently sand the surface of the tile in one direction, creating small scratches. Just be mindful not to go overboard and turn your tile into a jagged piece of modern art!
Can You Use Sandpaper on Porcelain?
Absolutely! Porcelain can handle a little bit of sanding action. If you have a porcelain surface that needs some TLC, grab a high-grit sandpaper, such as 400 to 600 grit. Gently sand the surface in a circular motion, applying light pressure. Take your time, and remember, patience is a virtue—especially when it comes to pampering your porcelain.
Can You Sand Clay?
Oh yes, you can definitely sand clay! If you’re working with air-dry clay or clay that hasn’t been fired yet, sanding can help smooth out any imperfections. Use a fine-grit sandpaper or sanding sponge to gently rub away rough spots and achieve a velvety texture. Just be careful not to get carried away and turn your clay masterpiece into a pile of crumbs!
How Do You Sand Down Ceramic?
Ready for some ceramic sculpting action? To sand down ceramic, you’ll need a fine-grit sandpaper or sanding sponge. Gently sand the ceramic surface in a circular motion, applying light pressure. Keep in mind that patience is key here. Take your time and be gentle to avoid damaging the ceramic. With a bit of sanding finesse, your ceramic creation will be simply smashing!
How Do I Get a Smooth Finish on Polymer Clay?
To give your polymer clay creations a smooth finish, you’re going to need a little magic touch. Start by using a soft-bristled brush or a clay sculpting tool to carefully blend and smooth the clay’s surface. You can also use a drop or two of baby oil or water to lubricate the clay, making the smoothing process even easier. The key is to be gentle, patient, and let your creativity flow!
Can You Sand Down a Porcelain Sink?
Feeling adventurous with your sink? Sanding down a porcelain sink is possible, but it requires caution. Use fine-grit sandpaper or a sanding sponge to gently sand the surface, removing any stains or imperfections. Take your time, and don’t exert too much pressure. Afterward, make sure to thoroughly rinse and wipe the sink to remove any residue. Voilà, a refreshed porcelain sink!
Can You Use Sandpaper on Ceramic?
Of course, sandpaper and ceramic can go hand in hand like a potter and their wheel. When working with ceramic, be sure to choose a fine-grit sandpaper. Gently sand the ceramic surface, using a circular motion and light pressure. Remember, slow and steady wins the race. With a little sanding finesse, your ceramic creation will be as smooth as glass!
Can Ceramics Be Sanded?
Absolutely! Ceramics can be sanded, buffed, and polished to perfection. Whether you’re working with pottery or decorative ceramic pieces, you can use sandpaper, sanding sponges, or even specialized ceramic tools to achieve the desired texture. Just be patient, take your time, and let your creativity ceramic-ulate into a work of art!
Remember, when it comes to sanding pottery ceramics, a little bit of patience and finesse goes a long way. So, go forth, embrace your inner ceramic artist, and create masterpieces that are as smooth as butter!